MCP Client Setup
This guide shows how to connect MCP clients to Mission Control.
MCP server URL
Use the Setup MCP flow to get the MCP server URL for your Mission Control tenant.
- In Mission Control, open the user menu and select Setup MCP.
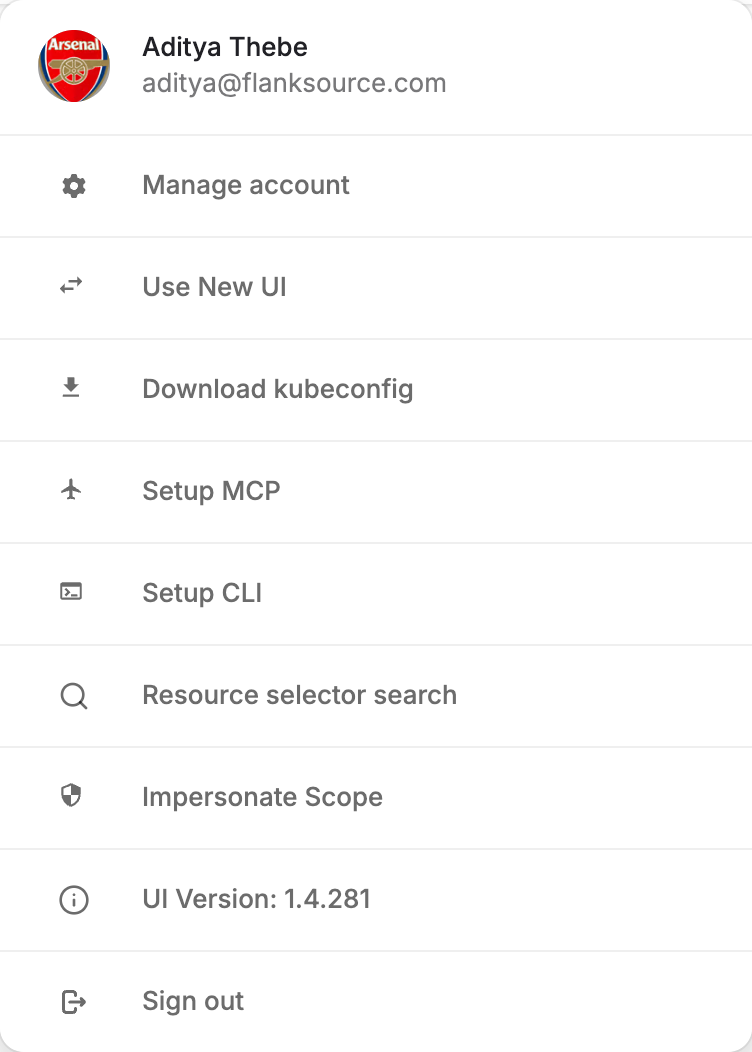
- Copy the MCP server URL from the setup dialog.
The MCP server URL uses one of these formats:
- SaaS users:
https://mc.<org-id>.workload-prod-eu-02.flanksource.com/mcp - Self-hosted users:
https://your.domain.com/api/mcp
Choose an authentication method
Mission Control supports two MCP authentication flows:
- OAuth: Use an MCP client that supports OAuth for remote MCP servers.
- Access token: Create a Mission Control access token and add it to your MCP client configuration.
- OAuth
- Access Token
OAuth
Use this approach when your MCP client supports OAuth for remote MCP servers.
Point the client at the MCP server URL.
Mission Control prefers Client ID Metadata Documents (CIMD) for OAuth client registration. Compatible clients use an HTTPS metadata URL as the client ID. Mission Control fetches that document during authorization.
Clients that do not support CIMD fall back to Dynamic Client Registration (DCR) at /oauth/register.
The client discovers the authorization server, registers with CIMD or DCR, and opens a browser for you to sign in. On the consent screen, check the client name and redirect address before you allow access.
The authenticating user needs the mcp:use permission.
Claude Code
Create or edit .mcp.json in your project root and add the Mission Control MCP server.
.mcp.json{
  "mcpServers": {
    "mission-control": {
      "name": "mission-control",
      "type": "http",
      "url": "https://mc.<org-id>.workload-prod-eu-02.flanksource.com/mcp"
    }
  }
}
VS Code
Create or edit .vscode/mcp.json in your project root and add the Mission Control MCP server.
.vscode/mcp.json{
  "servers": {
    "mission-control": {
      "url": "https://mc.<org-id>.workload-prod-eu-02.flanksource.com/mcp"
    }
  },
  "inputs": []
}
Claude Desktop Connectors
Claude Desktop supports remote MCP servers through Connectors.
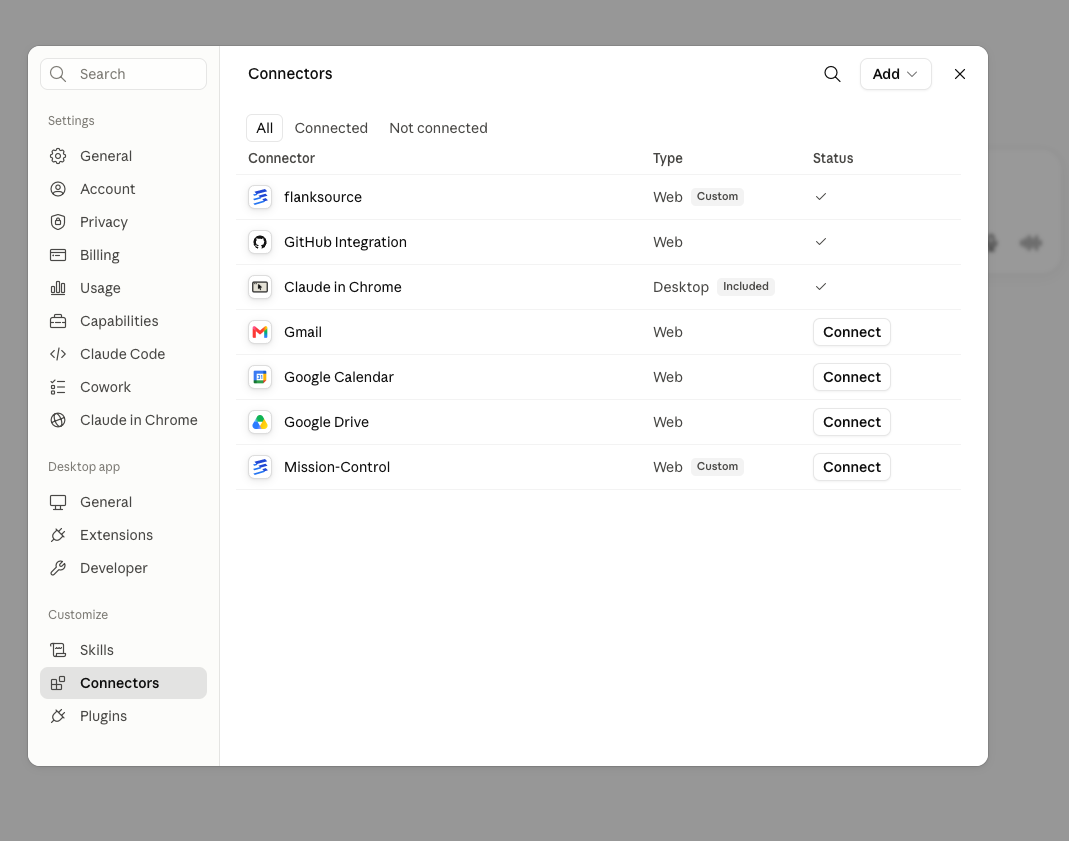
- In Claude Desktop, open Settings → Connectors.
- Select Add → Custom connector.
The Connectors page lists existing web connectors and custom connectors.
The Add custom connector dialog creates a remote MCP connector.
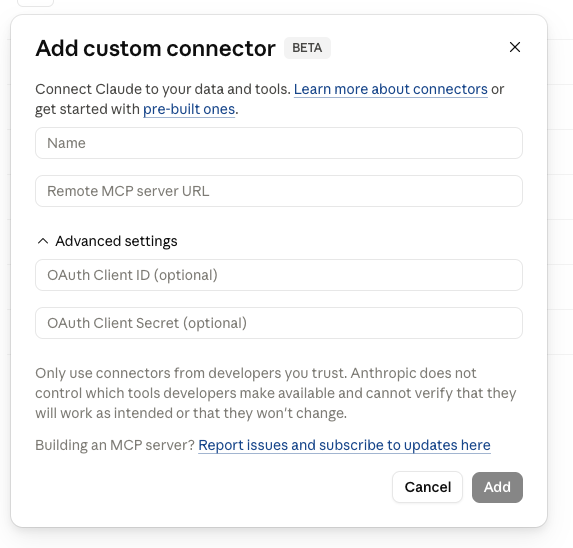
- In Name, enter
Mission-Control. - In Remote MCP server URL, enter your MCP server URL.
- Leave OAuth Client ID and OAuth Client Secret empty.
- Select Add.
- On the Connectors page, select Connect for the Mission Control connector.
- Complete the authentication flow.
Mission Control tools appear in Claude Desktop after the OAuth flow completes.
Access token
Use this approach when your MCP client does not support OAuth, or when you want to pass a Mission Control access token in the client configuration.
Create an access token
Use the Setup MCP flow to create an access token with MCP permissions.
- In Mission Control, open the user menu and select Setup MCP.
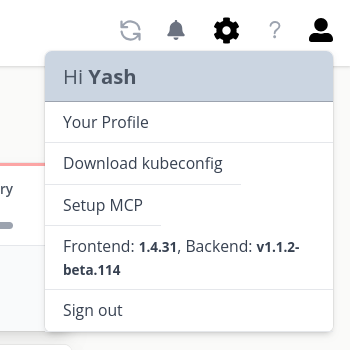
- Enter a token name.
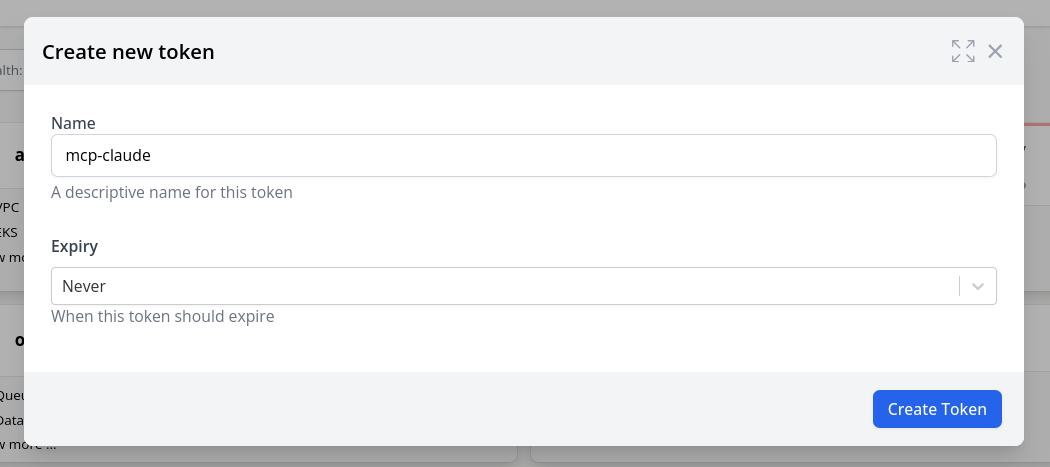
- Copy the generated config for your MCP client, or copy the token value.
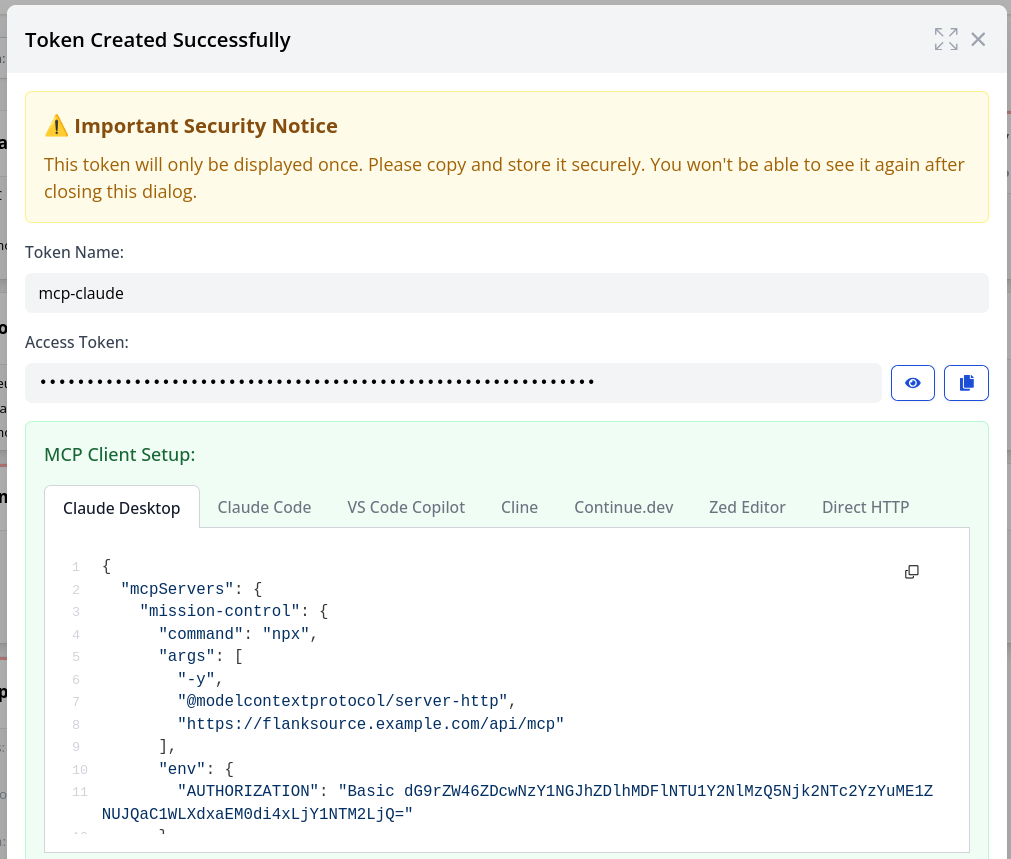
Some MCP clients use the access token as a bearer token. Other MCP clients use Basic authentication with username token and password <token value>.
When you use the Authorization: Basic <base64_token> header, encode token:<token_value> as the base64_token value.
Configure a client
- Claude Desktop
- Claude Code
- VS Code Copilot
- Cline
- Continue.dev
- Zed Editor
- Direct HTTP
Use the Claude Desktop configuration file when you need to pass an MCP bearer token directly from Claude Desktop.
- Open Claude Desktop settings.
- Select Developer → Edit Config.
- Add the Mission Control MCP server configuration.
claude_desktop_config.json{
  "mcpServers": {
    "mission-control": {
      "command": "npx",
      "args": [
        "-y",
        "mcp-remote@latest",
        "https://mc.<org-id>.workload-prod-eu-02.flanksource.com/mcp",
        "--header",
        "Authorization:${AUTH_HEADER}"
      ],
      "env": {
        "AUTH_HEADER": "Bearer YOUR_TOKEN_HERE"
      }
    }
  }
}
- Restart Claude Desktop.
- Mission Control tools appear in the tools menu.
Claude Code CLI supports MCP through the .mcp.json configuration file.
Setup Steps
- Create or edit the
.mcp.jsonfile in your project root or home directory - Add the Mission Control MCP server configuration:
.mcp.json{
  "mcpServers": {
    "mission-control": {
      "name": "mission-control",
      "type": "http",
      "url": "https://mc.<org-id>.workload-prod-eu-02.flanksource.com/mcp",
      "headers": {
        "Authorization": "Bearer YOUR_TOKEN_HERE"
      }
    }
  }
}
- Save the file and restart Claude Code
- Mission Control tools will be available in your sessions
GitHub Copilot Chat in VS Code supports MCP through the Copilot extensibility API.
Setup Steps
-
Ensure you have GitHub Copilot Chat installed in VS Code
-
Install the MCP extension for Copilot:
code --install-extension github.copilot-mcp -
Open VS Code settings (Cmd/Ctrl + ,)
-
Search for "Copilot MCP"
-
Add Mission Control configuration:
{
  "github.copilot.mcp.servers": {
    "mission-control": {
      "command": "npx",
      "args": [
        "-y",
        "@modelcontextprotocol/server-http",
        "https://mc.<org-id>.workload-prod-eu-02.flanksource.com/mcp"
      ],
      "env": {
        "AUTHORIZATION": "Basic YOUR_TOKEN_HERE"
      }
    }
  }
}
- Reload VS Code window
- In Copilot Chat, type
@mcpto access Mission Control tools
Using MCP in Copilot Chat
- Use
@mcp listto see available tools - Use
@mcp mission-control <command>to execute specific tools - Example:
@mcp mission-control query-catalog namespace=production
Cline supports MCP through its settings configuration.
Setup Steps
- Install Cline extension in VS Code
- Open VS Code settings (Cmd/Ctrl + ,)
- Search for "Cline MCP"
- Add Mission Control server configuration:
{
  "cline.mcpServers": {
    "mission-control": {
      "command": "npx",
      "args": [
        "-y",
        "@modelcontextprotocol/server-http",
        "https://mc.<org-id>.workload-prod-eu-02.flanksource.com/mcp"
      ],
      "env": {
        "AUTHORIZATION": "Basic YOUR_TOKEN_HERE"
      }
    }
  }
}
- Reload VS Code window
- Mission Control tools will be available in Cline chat
Continue.dev supports MCP servers through its configuration file.
Setup Steps
-
Open Continue configuration
- Click the gear icon in Continue sidebar
- Or edit
~/.continue/config.jsondirectly
-
Add Mission Control to the
mcpServerssection:
{
  "mcpServers": [
    {
      "name": "mission-control",
      "command": "npx",
      "args": [
        "-y",
        "@modelcontextprotocol/server-http",
        "https://mc.<org-id>.workload-prod-eu-02.flanksource.com/mcp"
      ],
      "env": {
        "AUTHORIZATION": "Basic YOUR_TOKEN_HERE"
      }
    }
  ]
}
- Restart Continue
- Mission Control tools will be available in chat
Zed supports MCP through its assistant configuration.
Setup Steps
- Open Zed settings (Cmd/Ctrl + ,)
- Navigate to Assistant settings
- Add Mission Control MCP configuration:
{
  "assistant": {
    "mcp": {
      "servers": {
        "mission-control": {
          "command": "npx",
          "args": [
            "-y",
            "@modelcontextprotocol/server-http",
            "https://mc.<org-id>.workload-prod-eu-02.flanksource.com/mcp"
          ],
          "env": {
            "AUTHORIZATION": "Basic YOUR_TOKEN_HERE"
          }
        }
      }
    }
  }
}
- Restart Zed
- Mission Control tools will be available in the assistant
For custom integrations or clients that support direct HTTP connections:
Connection Details
- Base URL:
https://mc.<org-id>.workload-prod-eu-02.flanksource.com/mcp - Protocol: HTTP with SSE (Server-Sent Events)
- Authentication: Basic token in Authorization header
Example Request
curl -X POST https://mc.<org-id>.workload-prod-eu-02.flanksource.com/mcp \
  -H "Authorization: Basic YOUR_TOKEN_HERE" \
  -H "Content-Type: application/json" \
  -d '{
    "jsonrpc": "2.0",
    "method": "initialize",
    "params": {
      "protocolVersion": "2024-11-05",
      "capabilities": {}
    },
    "id": 1
  }'
WebSocket Connection
For clients supporting WebSocket:
const ws = new WebSocket(
  'wss://mc.<org-id>.workload-prod-eu-02.flanksource.com/mcp/ws',
  {
    headers: {
      Authorization: 'Basic YOUR_TOKEN_HERE'
    }
  }
)

ws.on('open', () => {
  ws.send(
    JSON.stringify({
      jsonrpc: '2.0',
      method: 'initialize',
      params: {
        protocolVersion: '2024-11-05',
        capabilities: {}
      },
      id: 1
    })
  )
})
Troubleshooting
Common Issues
-
Connection Refused
- Verify the server URL is correct
- Check if you're behind a firewall or proxy
- Ensure the token has proper permissions
-
Authentication Failed
- Verify token is valid and not expired
- Ensure the user or token has the
mcp:usepermission - Check if Basic prefix is included
-
Tools Not Appearing
- Restart the client application
- Check client logs for errors
- Verify MCP server is properly configured
Testing Connection
You can test your MCP connection using the MCP CLI:
npx @modelcontextprotocol/cli connect \
  --transport http \
  --url https://mc.<org-id>.workload-prod-eu-02.flanksource.com/mcp \
  --header "Authorization: Basic YOUR_TOKEN_HERE"
Next Steps
Once connected, explore the available tools:
- Catalog Tools - Query and manage configuration items
- Connection Tools - Manage connections and integrations
- Playbook Tools - Execute and manage playbooks